This article will explore how to build a simple GUI calculator using Python and tkinter.
Table of Contents
- Introduction
- Project overview
- How to make a calculator in Python
- Complete code to make calculator in Python
- Conclusion
Introduction
If you are reading this article, you probably already know how to make a calculator program in Python, and now you want to learn how to build a GUI (graphic user interface) for such a program, so it’s more presentable and easily reusable.
Throughout this tutorial we will be working with tkinter, which is the standard GUI library for Python. If you are interested in learning more about the library and its functionality, the detailed guide is available online.
Project overview
Before we dive into the code, let’s first discuss what type of calculator we are going to build, its functionality, and its “must haves”.
The GUI we will be building will look like this:

The following features should be considered as “must haves” for this app:
- It must have an equation line (screen) to display the mathematical equation and the result.
- It must have buttons which must represent numerical values or mathematical operations, and be clickable.
- It must have the mathematical operations functionality (addition, subtraction, multiplication, division).
- It must perform mathematical calculations and return the result (=) as well as clear the equation line (c).
How to make a calculator in Python
In the following steps we will go through the process of building a GUI calculator in Python.
Step 1: Build GUI main screen for calculator in Python
As a first step, we are going to import the required dependency: tkinter.
Next we will define a Calculator class and add the __init__ method, and the execution statement. This will be our main frame on top of which we will be adding the GUI and calculator functionality.
This may look like a difficult to understand code, but we will discuss in detail what each part does, so bare with me.
from tkinter import *


#Create a calculator class
class Calculator:


    #Step 2 and 3: create the __init__ method
    def __init__(self, master):
        '''
        Method that initializes the object's attributes
        '''

        #Step 4: Assign reference to the main window of the application
        self.master = master

        #Step 4: Add a name to our application
        master.title("Python Calculator")


#Step 5: Execution
if __name__ == '__main__':

    #Step 6: Create the main window of an application
    root = Tk()

    #Step 6: Tell our calculator class to use this window
    my_gui = Calculator(root)

    #Step 6: Executable loop on the application, waits for user input
    root.mainloop()
Let’s discuss it step by step:
Step 1.1:
Create a Calculator class (which is an individual object with specified behaviour).
Step 1.2:
Define our first method: __init__.
This method is specific to Python classes and acts as a constructor in object oriented concepts. This method is called right away when an object is created and allows it to initialize its attributes.
Step 1.3:
Pass two arguments into __init__ method: self and master:
- self represents the instance of the class, which basically means that __init__ is a method of the Calculator class.
- master is a local variable that we pass into the __init__ method, and what it does is it creates a top level widget (usually the main window of an application). More details will be discussed further.
Step 1.4:
Create a reference to the main window of the application self.master=master within the Calculator class.
Then add a title to our application master.title(“Python Calculator”)
Step 1.5:
Add the standard execution starter if __name__==__’main‘__. This is a standard procedure and you can read find more details here.
Step 1.6:
Specify what should happen when we run the code:
- Define a local variable root and assign Tk() to it. Tk() is a tkinter class which creates the main application window.
- Define another local variable my_gui and assign Calculator class to is while passing root as an argument into it. Essentially this step creates a GUI by telling a class to use root (which is Tk()) as it’s main window.
- Add root.mainloop() where mainloop() is a method of Tk() basically telling the app to wait for events (clicks) and update the UI accordingly.
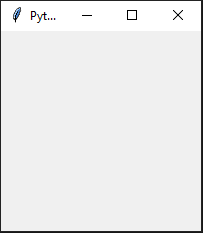
That was a lot of information to consume at once. But we have completed the first part of the tutorial and now we can actually see our initial screen.
Rune the code and you should see is the following:
Step 2: Add the equation line to GUI main screen
As the next step we would like to add an equation line to our calculator GUI, which is the same thing as the “display” on a real calculator where all of the operations are shown.
This part is very intuitive and requires us to add only two lines of code to the __init__ method:
#Step 1: Create a line where we display the equation
self.equation = Entry(master, width=36, borderwidth=5)

#Step 2: Assign a position for the equation line in the grey application window
self.equation.grid(row=0, column=0, columnspan=4, padx=10, pady=10)
The reason we are adding it to the __init__ method is because we want this to be “created” as soon as the application starts.
Let’s discuss it step by step:
Step 2.1:
We need to create some equation line that we want to add to our Calculator class, hence we define it as self.equation and then use a tkinter class Entry() to create a widget.
There are a few arguments that go into the Entry() class. We need to let it know that it should belong to our master window, as well as some basic styling properties such as width and borderwith (feel free to change these, but for now please follow with the values I have assigned).
Step 2.2:
We will then “place” the equation line onto the main screen. So far we have created the equation line which belongs to the Calculator class. But it doesn’t know yet where on the main screen it should be positioned. We will place at the top of our GUI . To do this, we qilluse the .grid() method of Entry() class along with some parameters.
We already know that it needs to be assigned to our “display”, hence the form self.equation.grid().
Now what goes into .grid() needs a little explanation:
- row – recall that Python indexing starts with 0, so first row has an index of 0 and the first column has an index of 0 as well.
- columnspan – it will specify how many “columns” will this line occupy. Take a look at the final image of the calculator app in the project overview section, an you will notice that the app buttons are placed into 4 columns. Since our equation line takes up the whole width of the screen, it means that it takes place of exactly 4 columns.
Note: this is also why we use the width of 36, since it can be divided by 4 without the remainder and keep the layout unaffected. - padx and pady – the basic paddings that are added to the top, bottom, left, and right of the equation line just to visually give it a little more space.
Making these additions to our code, you should arrive at the following:
from tkinter import *


#Create a calculator class
class Calculator:


    def __init__(self, master):
        """
        Method that initializes the object's attributes
        """

        #Assign reference to the main window of the application
        self.master = master

        #Add a name to our application
        master.title("Python Calculator")

        #Create a line where we display the equation
        self.equation = Entry(master, width=36, borderwidth=5)

        #Assign a position for the equation line in the grey application window
        self.equation.grid(row=0, column=0, columnspan=4, padx=10, pady=10)


#Execution
if __name__ == '__main__':

    #Create the main window of an application
    root = Tk()

    #Tell our calculator class to use this window
    my_gui = Calculator(root)

    #Executable loop on the application, waits for user input
    root.mainloop()
Run the code and you should see is the following:
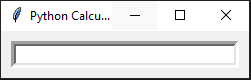
Notice that the application window actually became smaller, since now it is wrapped around the equation display. You can also freely type anything you want inside of the line just to test its ‘entry’ properties.
Step 3: Create buttons for calculator in Python
We have created the calculator main screen and the equation line attached to it. The next step is to add buttons to this GUI so it looks like an actual calculator.
This is the most tedious part of the code and technically a little more advanced than the previous sections. Let’s go through all of the code in detail.
We are going to create a new method createButton() and add the following code to it:
# Step 1: Create a method that belongs to an instance of the Calculator class
def createButton(self):
        """
        Method that creates the buttons

        INPUT: nothing
        OUTPUT: creates a button
        """

        #Step 2: We first create each button one by one with the value we want
        #Using addButton() method which is described below
        b0 = self.addButton(0)
        b1 = self.addButton(1)
        b2 = self.addButton(2)
        b3 = self.addButton(3)
        b4 = self.addButton(4)
        b5 = self.addButton(5)
        b6 = self.addButton(6)
        b7 = self.addButton(7)
        b8 = self.addButton(8)
        b9 =  self.addButton(9)
        b_add = self.addButton('+')
        b_sub = self.addButton('-')
        b_mult = self.addButton('*')
        b_div = self.addButton('/')
        b_clear = self.addButton('c')
        b_equal = self.addButton('=')

        # Step 3: Arrange the buttons into lists to represent calculator rows
        row1 = [b7,b8,b9,b_add]
        row2 = [b4,b5,b6,b_sub]
        row3 = [b1,b2,b3,b_mult]
        row4 = [b_clear,b0,b_equal,b_div]

        # Step4: Assign each button to a particular location on the GUI
        r = 1
        for row in [row1, row2, row3, row4]:
            c = 0
            for buttn in row:
                buttn.grid(row=r, column=c, columnspan=1)
                c += 1
            r += 1
Let’s discuss it step by step:
Step 3.1:
Define a new method createButton() and pass self as an argument to it. This basically assigns this method to the instance of the Calculator class.
Step 3.2:
Create button objects. You will notice that all of the buttons follow the same template: b[some name]=self.addButton(some value). It is a tedious process to create each button one by one, and it can be automated using a loop. For the purposes of explaining this step in detail, each button will be hard coded. Essentially each button name represents the action that we want this button to take. For example, b9 is a button for 9, b_add is a button for addition, and so on.
Now, the question that comes up is: what is this self.addButton()? It is another method that we will define later in the code. What it will do is it will create the button object we need with the value we need. It will be explained in the next section. The logic here is that for each button inside the createButton() method, we call the addButton() method in order to generate the button.
Step 3.3:
Arrange buttons into rows in which they appear on the calculator. What we want it to have 4 rows with 4 buttons in each row, so they appear in the following order:
Row 1: 7, 8, 9, +
Row 2: 4, 5, 6, –
Row 3: 1, 2, 3, *
Row 4: c, 0, =, /
Step 3.4:
Populate each row with the buttons. As the final step of adding buttons, we will loop through every column of every row and populate it with the buttons.
One thing to keep in mind is that we are starting from row index 1 to 4 (from r=1), since our row index 0 is populated with the equation line. And our columns will be indexed from 0 to 3.
Additional step:
This is an important step, and isn’t the chunk of code displayed above. After we have created this method to create the buttons, we need to “call” it from our __init__ method by adding self.createButton() to it.
After this section, the complete code so far should look like the following:
from tkinter import *


#Create a calculator class
class Calculator:


    def __init__(self, master):
        """
        Method that initializes the object's attributes
        """

        #Assign reference to the main window of the application
        self.master = master

        #Add a name to our application
        master.title("Python Calculator")

        #Create a line where we display the equation
        self.equation = Entry(master, width=36, borderwidth=5)

        #Assign a position for the equation line in the grey application window
        self.equation.grid(row=0, column=0, columnspan=4, padx=10, pady=10)

        #Execute the .creteButton() method
        self.createButton()


    def createButton(self):
        """
        Method that creates the buttons

        INPUT: nothing
        OUTPUT: creates a button
        """

        #We first create each button one by one with the value we want
        #Using addButton() method which is described below
        b0 = self.addButton(0)
        b1 = self.addButton(1)
        b2 = self.addButton(2)
        b3 = self.addButton(3)
        b4 = self.addButton(4)
        b5 = self.addButton(5)
        b6 = self.addButton(6)
        b7 = self.addButton(7)
        b8 = self.addButton(8)
        b9 =  self.addButton(9)
        b_add = self.addButton('+')
        b_sub = self.addButton('-')
        b_mult = self.addButton('*')
        b_div = self.addButton('/')
        b_clear = self.addButton('c')
        b_equal = self.addButton('=')

        #Arrange the buttons into lists which represent calculator rows
        row1 = [b7,b8,b9,b_add]
        row2 = [b4,b5,b6,b_sub]
        row3 = [b1,b2,b3,b_mult]
        row4 = [b_clear,b0,b_equal,b_div]

        #Assign each button to a particular location on the GUI
        r = 1
        for row in [row1, row2, row3, row4]:
            c = 0
            for buttn in row:
                buttn.grid(row=r, column=c, columnspan=1)
                c += 1
            r += 1


#Execution
if __name__=='__main__':

    #Create the main window of an application
    root = Tk()

    #Tell our calculator class to use this window
    my_gui = Calculator(root)

    #Executable loop on the application, waits for user input
    root.mainloop()
Note: if you try to run the code now, you should get an error. The reason for the error is that we used some addButton() method inside our createButton() method, but we haven’t specified what exactly it does. We are going to cover this in the next section.
Step 4: Add buttons to GUI
In this section we will work on adding the created buttons to the GUI.
Remember the addButton() method we used to create each button? This is exactly what we will focus on adding now. This method creates and returns a tkinter Button object that we will then add to the GUI.
The following few lines of code will help us:
# Step 1: Create a method that belongs to an instance of the Calculator class,
# and takes the "value" of the button as the second argument.
def addButton(self,value):
        """
        Method to create a button

        INPUT: value of the button (1,2,3,4,5,6,7,8,9,0,+,-,*,/,c,=)
        OUTPUT: returns a designed button object
        """

        #Step 2: Create the button object
        return Button(self.master, text=value, width=9)
Let’s discuss it step by step:
Step 4.1:
Define a new method addButton() and pass two arguments to it:
- self assigns this method to the instance of the Calculator class
- value is the actual “value” that we want to display on each of the buttons in our GUI
Step 4.2:
We create a Button class with a few parameters that we need:
- self.master – it assigns the Button object to the Calculator class.
- text=value – it will display the “value” we passed as an argument as text displayed on the button.
- width=9 – it is just styling, so we can adjust the width of the buttons.
Now let’s add it to our main code and run it:
from tkinter import *


#Create a calculator class
class Calculator:


    def __init__(self, master):
        """
        Method that initializes the object's attributes
        """

        #Assign reference to the main window of the application
        self.master = master

        #Add a name to our application
        master.title("Python Calculator")

        #Create a line where we display the equation
        self.equation = Entry(master, width=36, borderwidth=5)

        #Assign a position for the equation line in the grey application window
        self.equation.grid(row=0, column=0, columnspan=4, padx=10, pady=10)

        #Execute the .creteButton() method
        self.createButton()


    def createButton(self):
        """
        Method to create a button

        INPUT: nothing
        OUTPUT: creates a button
        """

        #We first create each button one by one with the value we want
        #Using addButton() method which is described below
        b0 = self.addButton(0)
        b1 = self.addButton(1)
        b2 = self.addButton(2)
        b3 = self.addButton(3)
        b4 = self.addButton(4)
        b5 = self.addButton(5)
        b6 = self.addButton(6)
        b7 = self.addButton(7)
        b8 = self.addButton(8)
        b9 =  self.addButton(9)
        b_add = self.addButton('+')
        b_sub = self.addButton('-')
        b_mult = self.addButton('*')
        b_div = self.addButton('/')
        b_clear = self.addButton('c')
        b_equal = self.addButton('=')

        #Arrange the buttons into lists which represent calculator rows
        row1 = [b7,b8,b9,b_add]
        row2 = [b4,b5,b6,b_sub]
        row3 = [b1,b2,b3,b_mult]
        row4 = [b_clear,b0,b_equal,b_div]

        #Assign each button to a particular location on the GUI
        r = 1
        for row in [row1, row2, row3, row4]:
            c = 0
            for buttn in row:
                buttn.grid(row=r, column=c, columnspan=1)
                c += 1
            r += 1


    def addButton(self,value):
            """
            Method to process the creation of a button and make it clickable
            INPUT: value of the button (1,2,3,4,5,6,7,8,9,0,+,-,*,/,c,=)
            OUTPUT: returns a designed button object
            """

            return Button(self.master, text=value, width=9)


#Execution
if __name__ == '__main__':

    #Create the main window of an application
    root = Tk()

    #Tell our calculator class to use this window
    my_gui = Calculator(root)

    #Executable loop on the application, waits for user input
    root.mainloop()
Run the code and you should see the following:

It is a full built GUI with clickable buttons. It works like a regular calculator app now, except nothing happens when the buttons are clicked.
Step 5: Assign Actions to Buttons
The last step if to add the actual mathematical functionality for the calculator app.
Let’s look at the following code:
# Step 1: Create a method that belongs to an instance of the Calculator class,
# and takes the "value" of the button as the second argument.
def clickButton(self, value):
        """
        Method to add actions for button clicks

        INPUT: value of the button (1,2,3,4,5,6,7,8,9,0,+,-,*,/,c,=)
        OUTPUT: what action will be performed when a button is clicked
        """

        #Step 2: Get the equation that's entered by the user
        current_equation = str(self.equation.get())

        #Step 3: If user clicked "c", then clear the screen
        if value == 'c':
            self.equation.delete(-1, END)

        #Step 4: If user clicked "=", then compute the answer and display it
        elif value == '=':
            answer = str(eval(current_equation))
            self.equation.delete(-1, END)
            self.equation.insert(0, answer)

        #Step 5: If user clicked any other button, then add it to the equation line
        else:
            self.equation.delete(0, END)
            self.equation.insert(0, current_equation+value)
This part is where we add the main mathematical calculations and it is a little more complicated than previous parts.
Let’s discuss the steps:
Step 5.1:
Define a new method clickButton() and pass two arguments:
- self assigns this method to the instance of the Calculator class
- value is the actual “value” that we want to display on each of the buttons in our GUI
Step 5.2:
In order for the calculator to know what to do next, it needs to know what is displayed in the equation line. In order to get the content from the equation line, we use the .get() method of the equation line (which is a tkinter Entry class).
This means that if, for example, we have “1+1” in the equation line, this function will take this line and store it as a string in the local current_equation variable.
Step 5.3:
Here we start adding logic for the clicks, and the simplest one to do is what should be the action performed by the calculator when a user clicks “c”.
We would want the equation line cleared if a user clicks “c”, and this is exactly what we do by using .delete() method of the equation line (which is a tkinter Entry class).
Step 5.4:
The second part of our conditioning is to add the action performed by the calculator when a user clicks “=”. What we want to do is to compute an answer and display it in the equation line.
It will include a few steps:
- First thing we do inside the elif part is compute the current_equation which we already have from Step 1. We use the Python eval() method which parses the string expression and “evaluates” it as if you ran it in Python directly and store it as a local variable answer. For example, if your current_equation is “1+1” and is a string, if you run 1+1 in Python, it will give you 2 as output. This is exactly what we do here.
- Then we delete the current text from the equation line using .delete() method of a tkinter Entry class (similar to how we cleared the line when user clicked “c”).
- And finally insert our answer into the equation line using .insert() method of a tkinter Entry class.
Step 5.5:
And the last step in the conditioning is to add what we can call a “catch all” condition that we put in the else part. Essentially, if a user is clicking anything else but “c” or “=”, it means that they are clicking on a digit from 0 to 9 or a mathematical operation sign (+, -, *, /). All we want to do in that case is to add it to our equation line.
– First, we delete the existing text in the equation line .delete() method of a tkinter Entry class.
– Then we concatenate the current_equation with value (which is the recent click) and insert it into the equation line using .insert() method of a tkinter Entry class. As an example, if you currently have “1+” in your equation line and then click “1”, what we do is glue together “1+” and “1” to get “1+1” and paste in back into the equation line.
Additional step:
The last step that we need to do is to let our buttons know what action belongs to each of them when they are clicked. To do that we need to go back to our addButton() method and add one more parameter to the Button() object creation. What we need to add is a command. A command is a parameter for the button to let it know what it should do, and what each button should essentially do is use clickButton() method as its parameter. So we need to change the code in the addButton() method from:
return Button(self.master, text=value, width=9)
To:
return Button(
    self.master,
    text=value,
    width=9,
    command=lambda: self.clickButton(str(value)),
)
Now, when our buttons are created, the GUI knows what the assigned action to a click of each button.
Complete code to make calculator in Python
The final code for the complete basic GUI calculator in Python that we just made should look like this:
from tkinter import *


#Create a calculator class
class Calculator:


    def __init__(self, master):
        """
        Method that initializes the object's attributes
        """

        #Assign reference to the main window of the application
        self.master = master

        #Add a name to our application
        master.title("Python Calculator")

        #Create a line where we display the equation
        self.equation = Entry(master, width=36, borderwidth=5)

        #Assign a position for the equation line in the grey application window
        self.equation.grid(row=0, column=0, columnspan=4, padx=10, pady=10)

        #Execute the .createButton() method
        self.createButton()


    def createButton(self):
        """
        Method to create a button

        INPUT: nothing
        OUTPUT: creates a button
        """

        #We first create each button one by one with the value we want
        #Using addButton() method which is described below
        b0 = self.addButton(0)
        b1 = self.addButton(1)
        b2 = self.addButton(2)
        b3 = self.addButton(3)
        b4 = self.addButton(4)
        b5 = self.addButton(5)
        b6 = self.addButton(6)
        b7 = self.addButton(7)
        b8 = self.addButton(8)
        b9 = self.addButton(9)
        b_add = self.addButton("+")
        b_sub = self.addButton("-")
        b_mult = self.addButton("*")
        b_div = self.addButton("/")
        b_clear = self.addButton("c")
        b_equal = self.addButton("=")

        #Arrange the buttons into lists which represent calculator rows
        row1 = [b7, b8, b9, b_add]
        row2 = [b4, b5, b6, b_sub]
        row3 = [b1, b2, b3, b_mult]
        row4 = [b_clear, b0, b_equal, b_div]

        #Assign each button to a particular location on the GUI
        r = 1
        for row in [row1, row2, row3, row4]:
            c = 0
            for buttn in row:
                buttn.grid(row=r, column=c, columnspan=1)
                c += 1
            r += 1


    def addButton(self, value):
        """
        Method to process the creation of a button and make it clickable

        INPUT: value of the button (1,2,3,4,5,6,7,8,9,0,+,-,*,/,c,=)
        OUTPUT: returns a designed button object
        """

        return Button(
            self.master,
            text=value,
            width=9,
            command=lambda: self.clickButton(str(value)),
        )


    def clickButton(self, value):
        """
        Method to add actions for button clicks

        INPUT: value of the button (1,2,3,4,5,6,7,8,9,0,+,-,*,/,c,=)
        OUTPUT: what action will be performed when a particular button is clicked
        """

        #Get the equation that's entered by the user
        current_equation = str(self.equation.get())

        #If user clicked "c", then clear the screen
        if value == "c":
            self.equation.delete(-1, END)

        #If user clicked "=", then compute the answer and display it
        elif value == "=":
            answer = str(eval(current_equation))
            self.equation.delete(-1, END)
            self.equation.insert(0, answer)

        #If user clicked any other button, then add it to the equation line
        else:
            self.equation.delete(0, END)
            self.equation.insert(-1, current_equation + value)


#Execution
if __name__ == "__main__":

    #Create the main window of an application
    root = Tk()

    #Tell our calculator class to use this window
    my_gui = Calculator(root)

    #Executable loop for the application, waits for user input
    root.mainloop()
This code is also available on my GitHub page.
Conclusion
In this article we covered how you can create a custom basic GUI calculator in Python using tkinter library. I also encourage you to check out my other posts on Python Programming.
Feel free to leave comments below if you have any questions or have suggestions for some edits.
WOW. The way you explain the procedure for each of the lines is incredible, a great explanation and code execution